Beginner Skills
NOTE: The content here is for those who are ready to build their skills and are seeking guidance. You do not need to know any of this in order to show up at and enjoy an orienteering event! That’s right, you can just show up, get the 101 from a newcomer instructor, jump in, and have a ton of fun. That said, if you’re ready to build some skills, read on.
Basic Skills
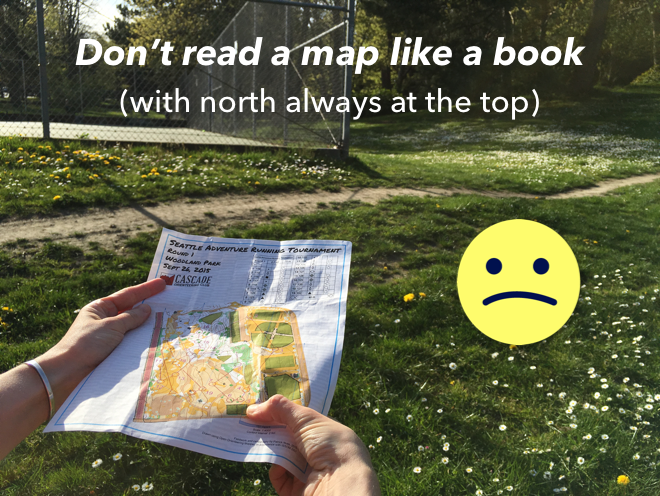
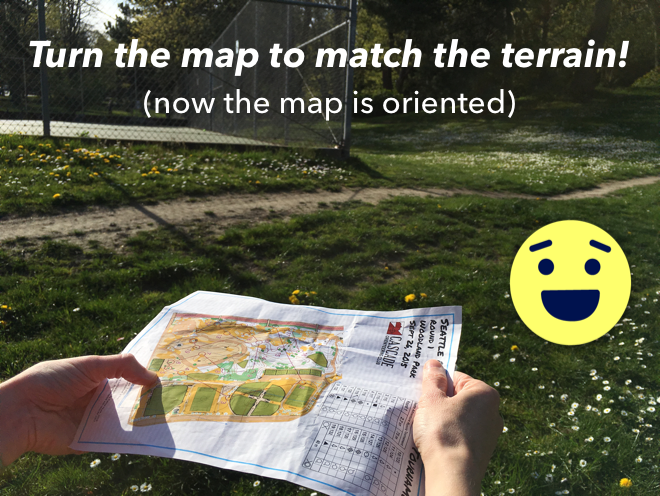
ORIENTING THE MAP
The most important skill in orienteering is… orienting the map!
Maps aren’t meant to be held like books, with north always at the top. Maps are meant to be oriented to match the terrain. So if you see a river ahead of you in real life, rotate the map so that the same river is also ahead of you on the map.
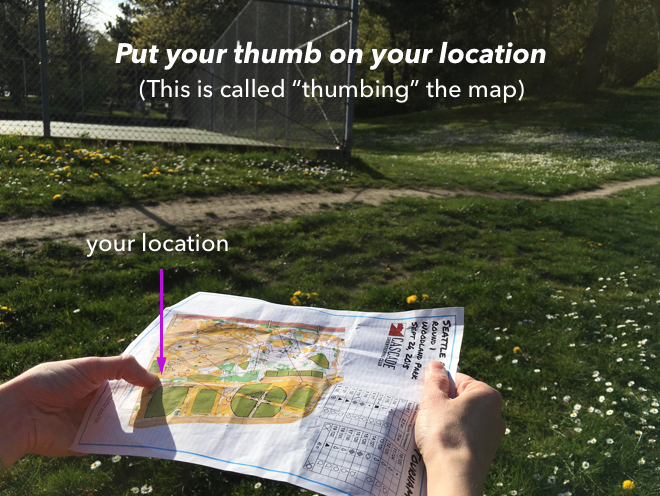
THUMBING THE MAP
The second most important skill in orienteering is… thumbing the map!
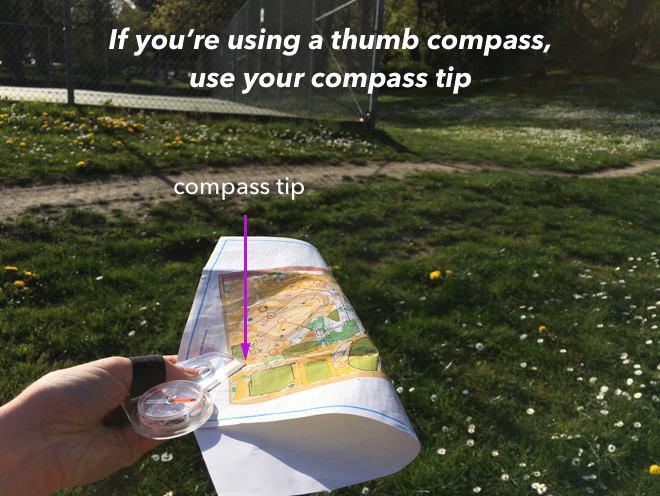
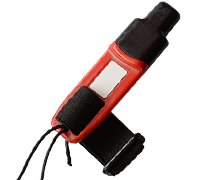
It may seem incredibly simple, but it is incredibly important to find where you are on the map, then put your thumb or your compass tip there. As you move along, continuously update your thumb to your current location. This helps you find where you are on the map at a glance, and in case you get confused, you’ll at least know that you’re somewhere near your thumb. Thumbing the map is an important core skill and the foundation for more advanced compass skills.
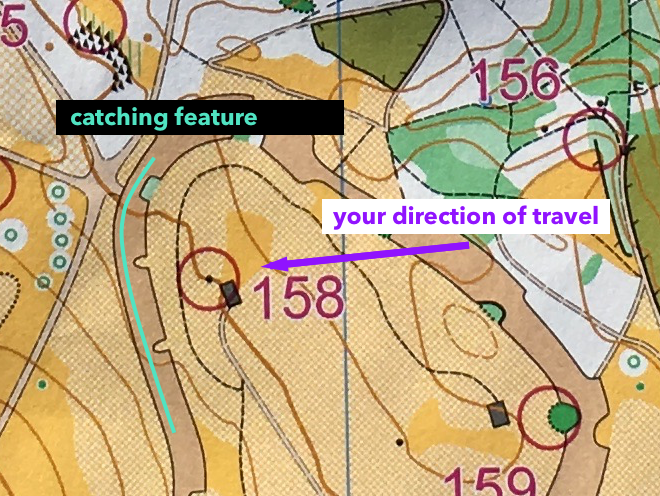
CATCHING FEATURES
Whenever you see a feature in the terrain and update your thumb or compass tip, you are “collecting features.” So you move along and see a trail intersection, then update your thumb, see a creek crossing, then update your thumb, and so on.
However, in case you misinterpret the terrain, how will you know that you’ve made a mistake? A common practice in orienteering is to identify a catching feature. A catching feature is a broad and easily identifiable feature, typically linear and perpendicular to your path of travel, that will “catch” you like a baseball backstop in case you go too far. Good catching features are distinct trails or roads, distinct ridges or valleys, distinct rivers, and really anything that is linear in shape and distinct enough that you won’t miss it.
Reading the Map
SCALE
Orienteering maps are specially made for orienteering, and show an incredible amount of detail. On an orienteering map, you can see features such as a small bends in the trail, hills only 5 meters tall, and even individual boulders that are just a meter tall. By contrast, a hiking map shows only dramatic trail bends and prominent hilltops, and small features like individual boulders are not mapped at all.
The reason orienteering maps can show so much detail is due to their large scale. A map scale indicates how “zoomed in” or “zoomed out” it is. For instance, a hiking map is typically zoomed way out (small scale) so that a centimeter on the map is almost a kilometer on the ground, whereas an orienteering map is zoomed way in (large scale) so that a centimeter on the map is typically only 100 meters on the ground, or even less!
At your first orienteering event, be prepared for features to appear much sooner than you anticipated; it can take awhile to get adjusted to such a large map scale!
CONTOUR INTERVALS
Another reason that orienteering maps can show an incredible amount of detail is due to small contour intervals.
Contours are the brown (and often squiggly) lines on a map that connect points of equal elevation. In other words, contour lines describe the shape, or topography, of the land.
On a hiking map, the difference in height between one contour line to the next is often 80 feet. On an orienteering map, the difference is typically just 5 meters, and sometimes less. Imagine all of the detail that could be lost in 80 feet: hills, cliffs, small ridges, and more. On an orienteering map, these small features are mapped!
At your first orienteering event, be on the lookout for much smaller features than you might expect. Instead of a hill 80 feet tall, you may be looking for a hill just 6 feet tall!
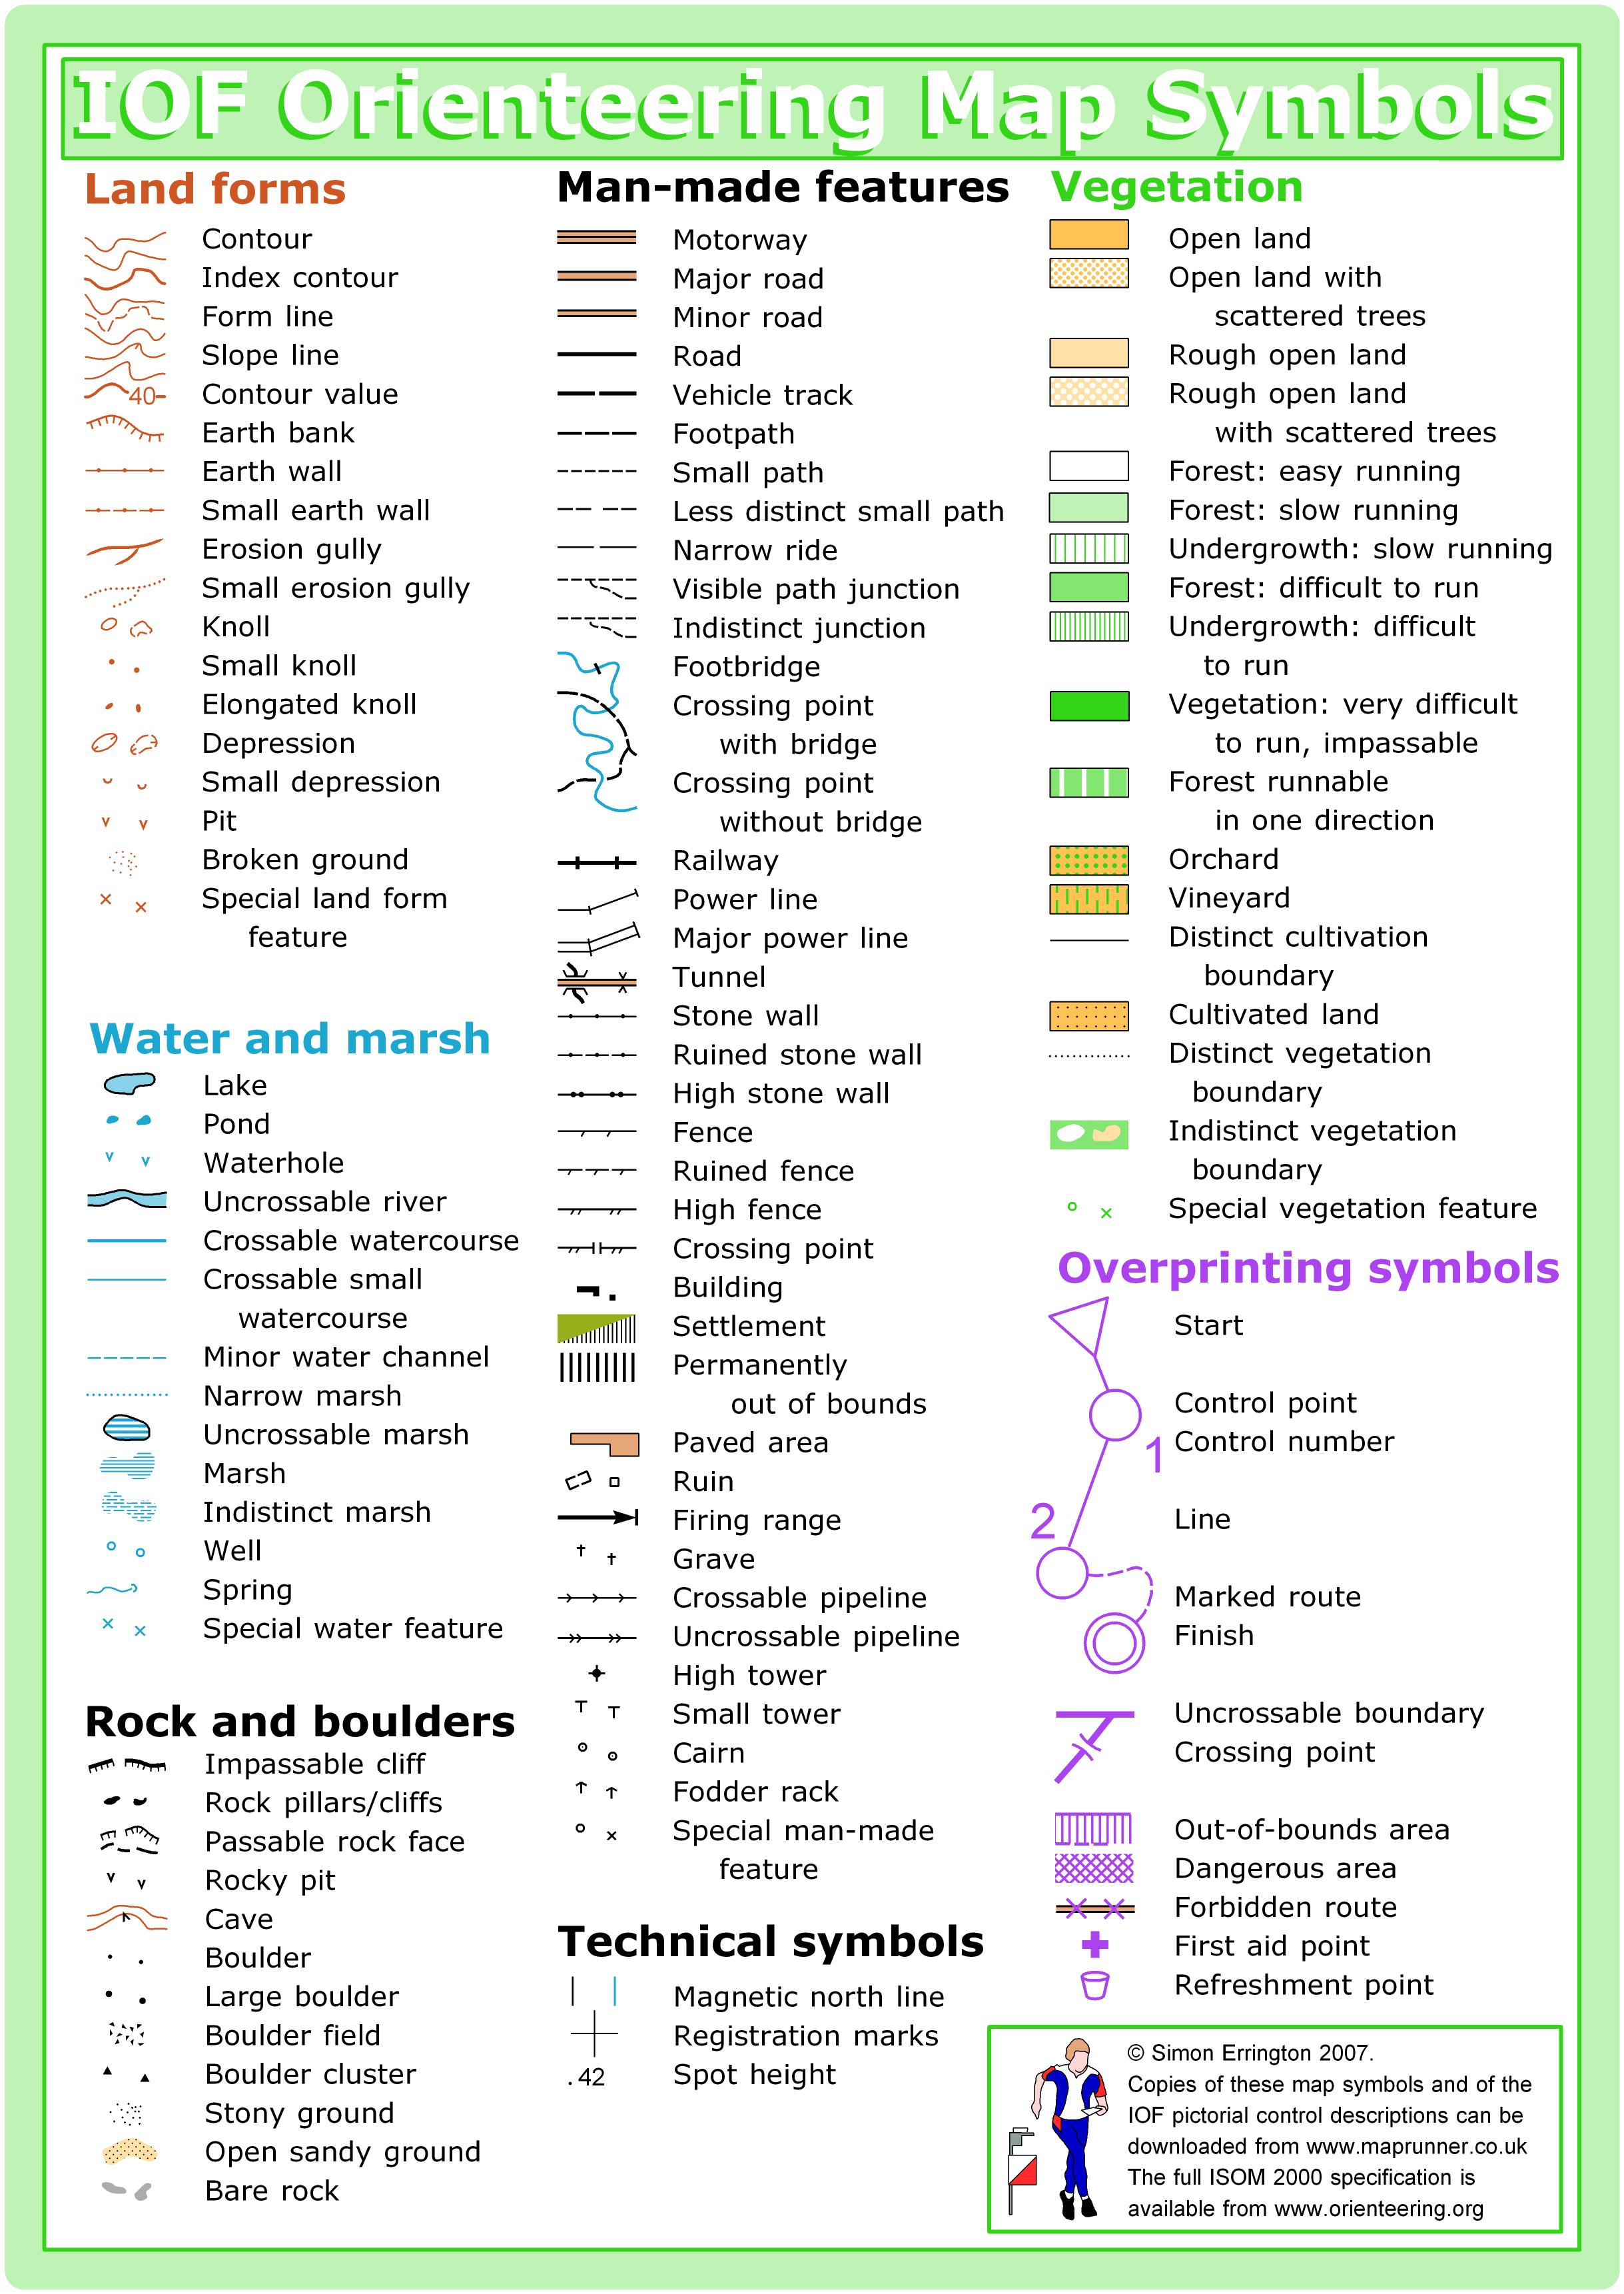
COLORS AND SYMBOLS
Colors
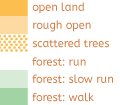
In addition to showing topography and trails, orienteering maps also show vegetation through color. The colors are designed to convey not just the type of vegetation, but also how passable it is.
For instance, a forest mapped as white is defined as forest that you can “run” through because there is little undergrowth to slow you down, whereas a forest mapped as medium green would require an orienteer to “walk.” You’ll want to avoid dark green forest, which requires “fight” to pass through, and usually means blackberries in Washington!
Don’t worry about learning all the map colors at once. Maps for intermediate courses always have a legend printed on them, so you can learn as you go.
Symbols
In addition to all this detail, orienteering maps also have point features. Point features include things like individual boulders, distinct trees, prominent rootstocks, and even man-made features like a park bench.
Some symbols always represent the same feature: a brown ‘u’ shape always represents a depression. Other symbols represent a type of feature: a blue ‘x’ is a special water feature, and could be a fire hydrant, drinking fountain, or something else water-related. A few symbols can represent any type of man-made feature, and that is a black ‘x’ or ‘o’. These could be park benches, light poles, statues, or some other man-made thing.
Don’t worry about learning all the symbols at once. Maps for intermediate courses always have a legend printed on them, so you can learn as you go.
Courses
An orienteering course is marked on a map with magenta shapes and lines. The start is a triangle, the checkpoints (“controls”) are in the exact center of circles, and the finish is two concentric circles.
In a point-to-point event, participants must complete the course in a prescribed order by visiting control number 1, then 2, then 3, and so on. In this case, control circles are connected by lines to help you see where to go to next. You do not need to travel on the line; you get to choose your own route!
In a score-o event, participants can find controls in any order, and the goal is to find as many as possible within a time limit. A score-o uses the same symbols as a point-to-point, except that there are no lines connecting control circles.
Control Description
Control descriptions may look like hieroglyphics, but they’re an international standard. So once you learn how to read control descriptions, you can read them anywhere in the world!
Control descriptions have eight available columns of information for each control, which is a lot! But don’t worry about memorizing them all, because the first two columns have the most essential information, and are also the easiest to learn. For Beginner level courses we provide the meaning of the symbols in each column.
The first two columns show numbers. The first column denotes what order you must find the controls in (if required), and the very important second column denotes the number that you will find on the physical control. So if you see “2, 85,” that is the second control you must find and you will see the number 85 on the control when you find it. If the number in the second column does not match the control you’ve found, then you’ve found a control that is on another course! (Sorry, there are no bonus points for finding extra controls.)
The third column describes the physical feature where the control will be located. You should see this feature on your map in the center of the control circle.
The seventh column tells you what side or area of a feature the control is on. So if the control is on a boulder, this column will tell you which side of the boulder the control is on (north side, north western side, eastern side). These symbols are the most intuitive to learn, as well as the most helpful to know.
The other columns take more time to learn, but also don’t show you much information that the map doesn’t show you already. Fortunately, they columns that are the most challenging to learn, are the least essential ones!
Learning control description symbols may feel intimidating, but don’t let that stop you from orienteering. You can have fun and complete an orienteering course by reading just the first two columns, the easiest columns to learn! You can learn the other columns over time. There is typically a control description legend posted at the start of Cascade events, or you can ask any experienced orienteer you see, we’re friendly and love to help!
Coaching
Teaching new orienteers? Check out our Coach’s Handbook for more ideas to help students of all ages.
